Learn what’s new in SolidWorks 2015
p>In this edition of our ‘New in SolidWorks 2015’ series we’re moving onto the Parts & Features section of Update Training 2015, be sure to check out the free Surface Curvature Combs video tutorial! The SolidWorks 2015 Update Training course shows users how they can take advantage of new functionalities while leveraging industry best-practices and time saving techniques. Update Training 2015 for SolidWorks is packed with 46 unique lessons covering topics including, Fundamentals, Sketching,
Parts and Features, Assemblies, Drawings & Detailing, Sheet Metal, and Weldments.
Update Training – Parts and Features
All SolidWorks file types are made up of Parts, and all part models are made up of a combination of different features. By covering the new tools, enhancements, and workflows made for features, you will be able to create your Solidworks models more quickly and efficiently by applying the latest industry best-practices and time saving techniques.
The Parts and Features section of Update Training covers the enhancements to familiar features, such as the new asymmetric fillet option, creating reference planes normal to your view orientation, and using open profiles for cut features. We also go over the new Pattern Options, as well as the new end conditions available with the Move Face tools, which allows you to make geometric changes to your model using the model geometry. In this section, you’ll also learn the new Surface feature enhancements, like flattening and adding curvature combs to surfaces.
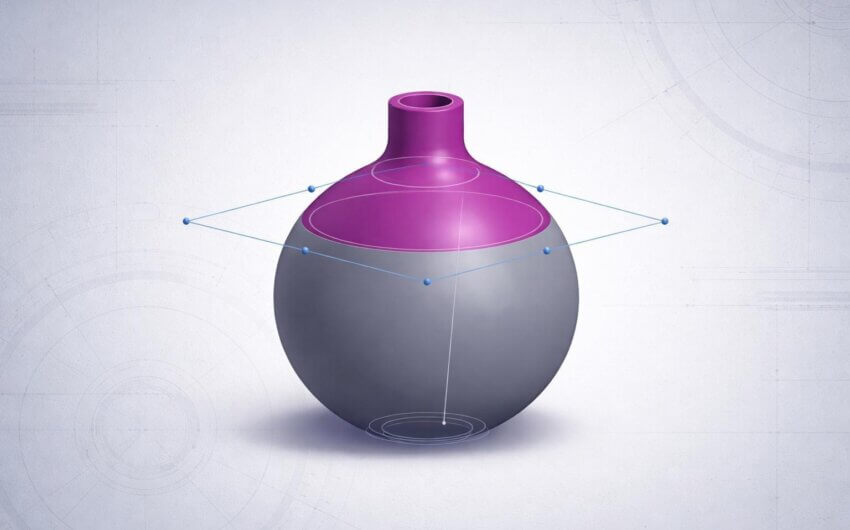
When you’re working with “swoopy” geometry, like splines or surfaces, Curvature Combs allow you to see a graphical representation of the curvature at any given point along a curve.
This can be very useful when designing complex surfaces because Curvature Combs allow you to determine not only how quickly a Curvature is changing, but also pinpoint where the Curvature changes directions. This can help you predict where errors are more likely to occur and determine if faces will transition smoothly across a part.
In previous years, you were only able to view Curvature Combs along Sketches and while creating certain features like Boundary Surfaces. For 2015, SolidWorks has expanded this ability. You can now view Curvature Combs for any surface so that you can better analyze the transition between adjacent surfaces.
To view Curvature Combs on a Surface, launch the View drop-down menu and select “Surface Curvature Combs” under the Display section. Alternatively you can right-click on a Surface and select “Surface Curvature Combs” from the Face section. Selecting the option will launch the PropertyManager.
The first thing you’ll want to do is determine how you want SolidWorks to display the Surface Curvature Combs. You have 2 options: Persistent display, or Dynamic display. When Persistent is selected, you’ll be able to select specific surfaces or faces to display the combs on. In the tutorial video we’ll select the two top surfaces. Under Curvature Display, you can change the mesh density to increase or decrease how many rows of combs are shown. You can toggle the Direction One or Direction Two combs on or off, and also modify their colors. Additionally you can edit the scale, which changes the relative size of the combs, or the density of the combs. Clicking OK, the Combs remain visible on the surface. From there you can use the Curvature combs to inspect the surfaces for tangency and curvature problems.
To turn off the Surface Curvature Combs, you can revisit either the View drop-down menu, or by simply right-clicking on a Surface and selecting Surface Curvature Combs.
If instead you want to view the curvature combs at certain locations on a surface, you can use the dynamic display type. In the tutorial video we’ll open up the Surface Curvature Combs once more, this time we’ll select Dynamic under the Display section. The selection box no longer appears, instead the curvature combs appear as you hover your cursor over the surface. You’ll see the values for the Curvature and Radius of Curvature appear next to the cursor. To place the curvature combs, simply click the location where you want to place them. You can add as many locations as you want, with the ability to edit their scale and density.
One thing you know about the Dynamic display style is that unlike the Persistent display style, when you exit the PropertyManager, the combs are no longer shown.
You can also display Surface Curvature Combs for Sweeps, Lofts, Boundary Boss and Bases, Boundary Surfaces and Fill Surfaces, all using the PropertyManager.
In the tutorial video we’ll edit the first Boundary feature in our part, you’ll notice that the Curvature Display options at the bottom of the PropertyManager.
The Curvature Combs section has many of the same capabilities as the Surface Curvature Combs tool, including the ability to toggle directions on and off, change their colors, and edit the scale and density of the combs.
Our next stop in this series is
Assemblies. Stay-tuned for more free SolidWorks 2015 tutorial videos!
Did you miss
Sketching yesterday? Or
Fundamentals earlier this week? Check out these linked articles!
Existing Members can log in and access the full course. Don’t have a SolidProfessor account yet? Sign up today!


