


Learn these 5 Autodesk Inventor tips in under 5 minutes
Autodesk Inventor is one of the most robust, cutting-edge CAD software tools on the market. If you work for large engineering design departments or production facilities, chances are you’ll be working with Autodesk Inventor at some point in your career.
Autodesk Inventor allows you to create complex and elegant 3D models. But the ability to innovate in this software is often met with a steep learning curve. Autodesk Inventor, while extremely powerful, isn’t always user friendly.
Whether you’re brand new to working with Autodesk Inventor or have many years of experience in the software, you can improve your workflow in just a few minutes by learning these five tips and tricks.
Hint: Maximize your time with even more Autodesk Inventor Tips & Tricks (including these five!) by downloading our free e-guide. Download Now >>
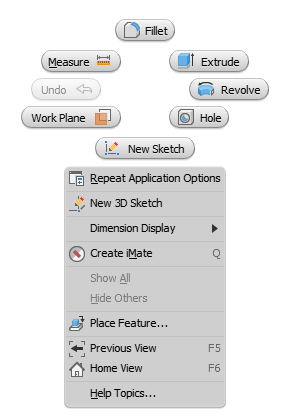
Tip #1: Use the Marking Menu and Context Menu
To make the most of your Inventor user interface, try using the Marking Menu and Context Menus.
These menus are accessible by right-clicking and are gesture-based. They are also context-sensitive.
You can also customize these menus by selecting Tools and then Customize.
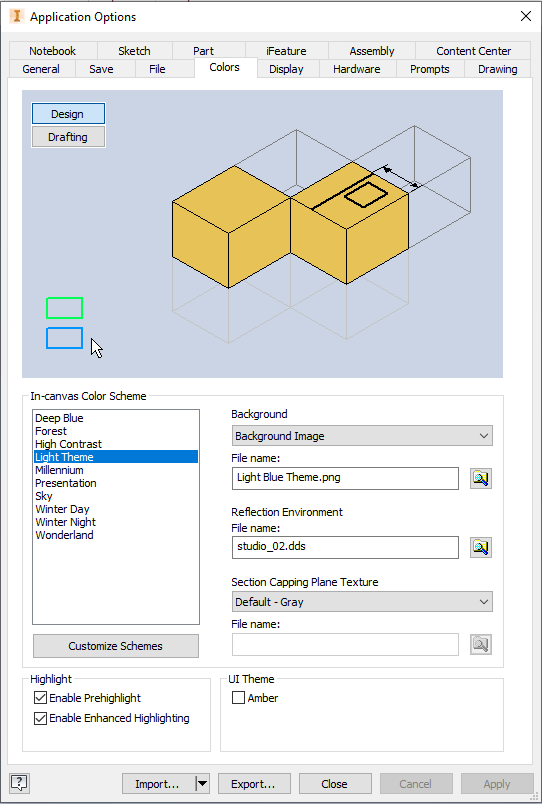
Tip #2: Adjust the Color Scheme Options
There are several reasons to adjust your color scheme in Autodesk Inventor, from usability to branding. This tip is useful for quickly seeing if your design is fully defined or not. This feature is especially helpful if you or any of your team members are colorblind!
To customize your color scheme, select Tools, then Application Options, and finally Colors.

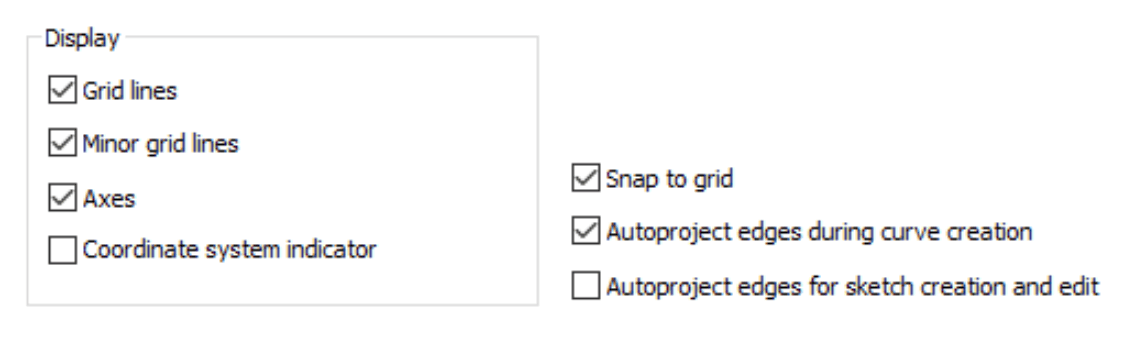
Tip #3: Display Grid Lines
Displaying grid lines in Autodesk Inventor can help you transition from hand drawing to CAD drawings.
When you display Grid lines, they are set to a 1/8″ scale by default. You also have the option to Snap to grid in settings. Snaps occur at 1/16″ increments by default, but you can control this with the toggle at the bottom of your screen.
You can display grid lines by selecting Application Options and then the Sketch tab.
BONUS TIP: Save even more time by using Autodesk Inventor keyboard shortcuts!
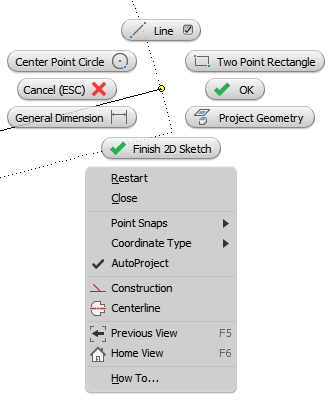
Tip #4: Use Line Tool Shortcuts
Try time-saving line tool shortcuts!
- Click and hold the end point to draw a tangent arc. Press Escape to go back without placing the arc.
- Close a sketch profile by using the right-click menu. This keeps the tool line active.
- Restart through the right-click menu or by pressing Enter.
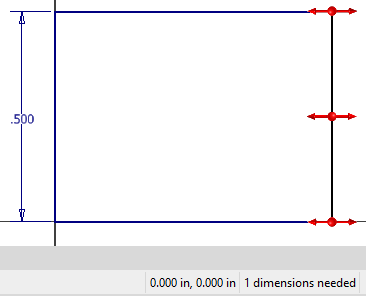
Tip #5: Try Constraint Control
You can Show or Hide constraints by selecting F8 or F9 respectively. There is also a toggle on the status bar.
Hold Control to suspend auto-constraints.
You can also control which constraints are inferred in Constraint Settings. Find Constraint Settings by selecting Application Options and then the Sketch tab.
Ready for more? Access 20 more quick tips just like these with your free Autodesk Inventor Tips & Tricks E-Guide! And if that’s not enough, sign up for SolidProfessor to access our entire library of over 1,000 Autodesk Inventor tutorials.